Best Web Design Company in Coimbatore
Best Web Design Company in Coimbatore A well-designed website is not only essential in today's digital-first world, but it is also a potent instrument for creating brand identification, i
Read More
In this blog post, I’ll show you ways to line up Gmail together with your custom email for free of charge. While Gmail a part of this method is 100% free, there are some caveats to the present method therein you’ll get to have already got email hosting to form it works. Typically, you'd get this through your web host if you've got an internet site.
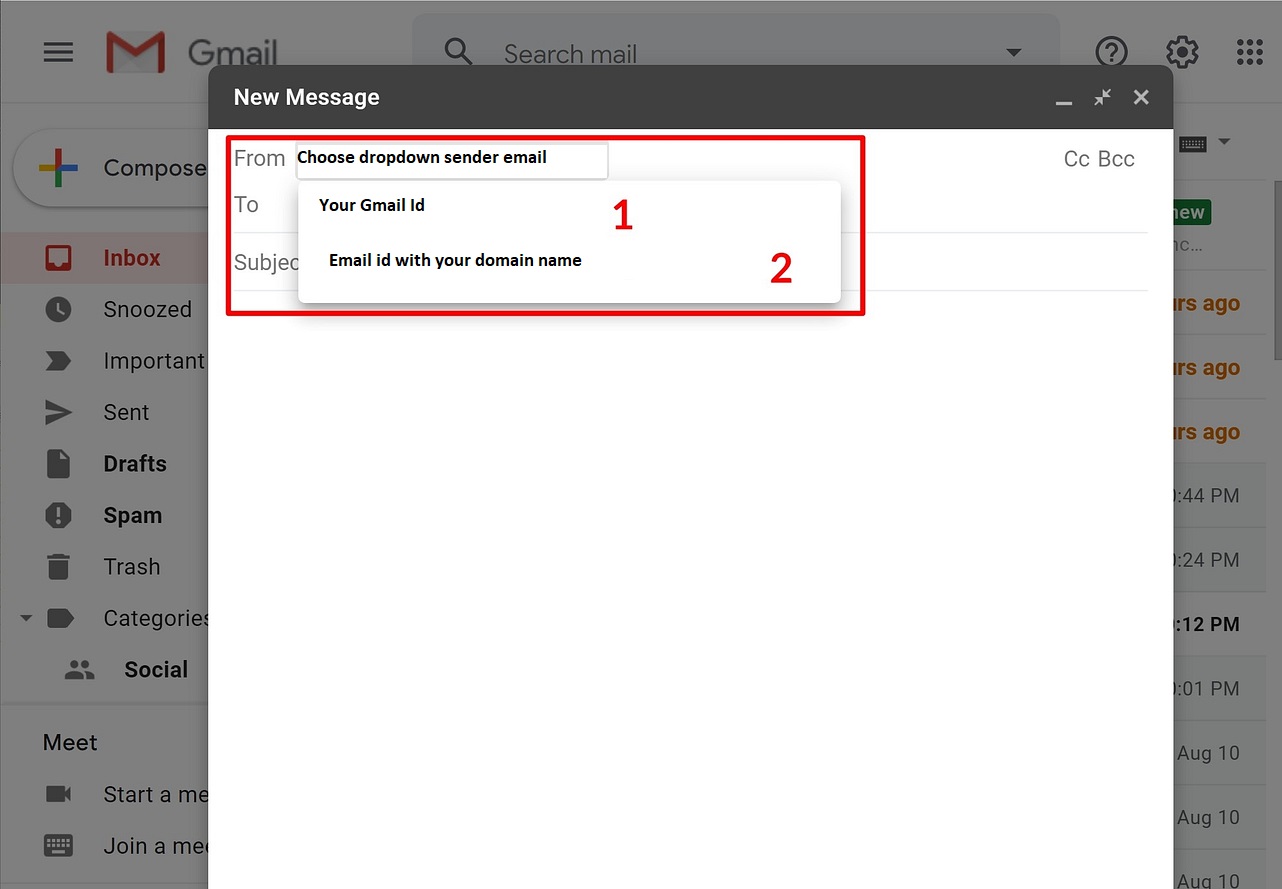 1. Create a free Gmail account
To get started, create a free Gmail account – e.g. username@gmail.com. If you have already got a Gmail account, you'll use your existing account.
Then, you need to make your custom email address utilizing your email facilitating in the event that you haven't done so as of now. For example you@domainname.com.
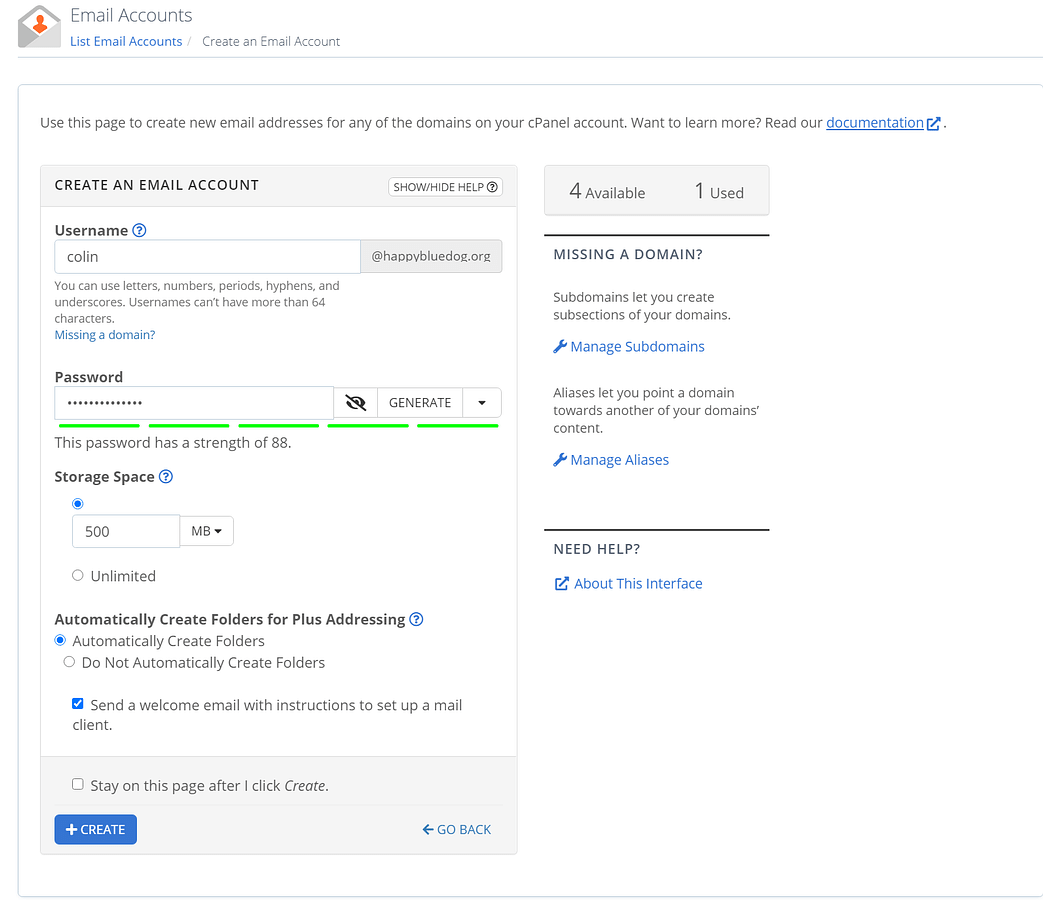
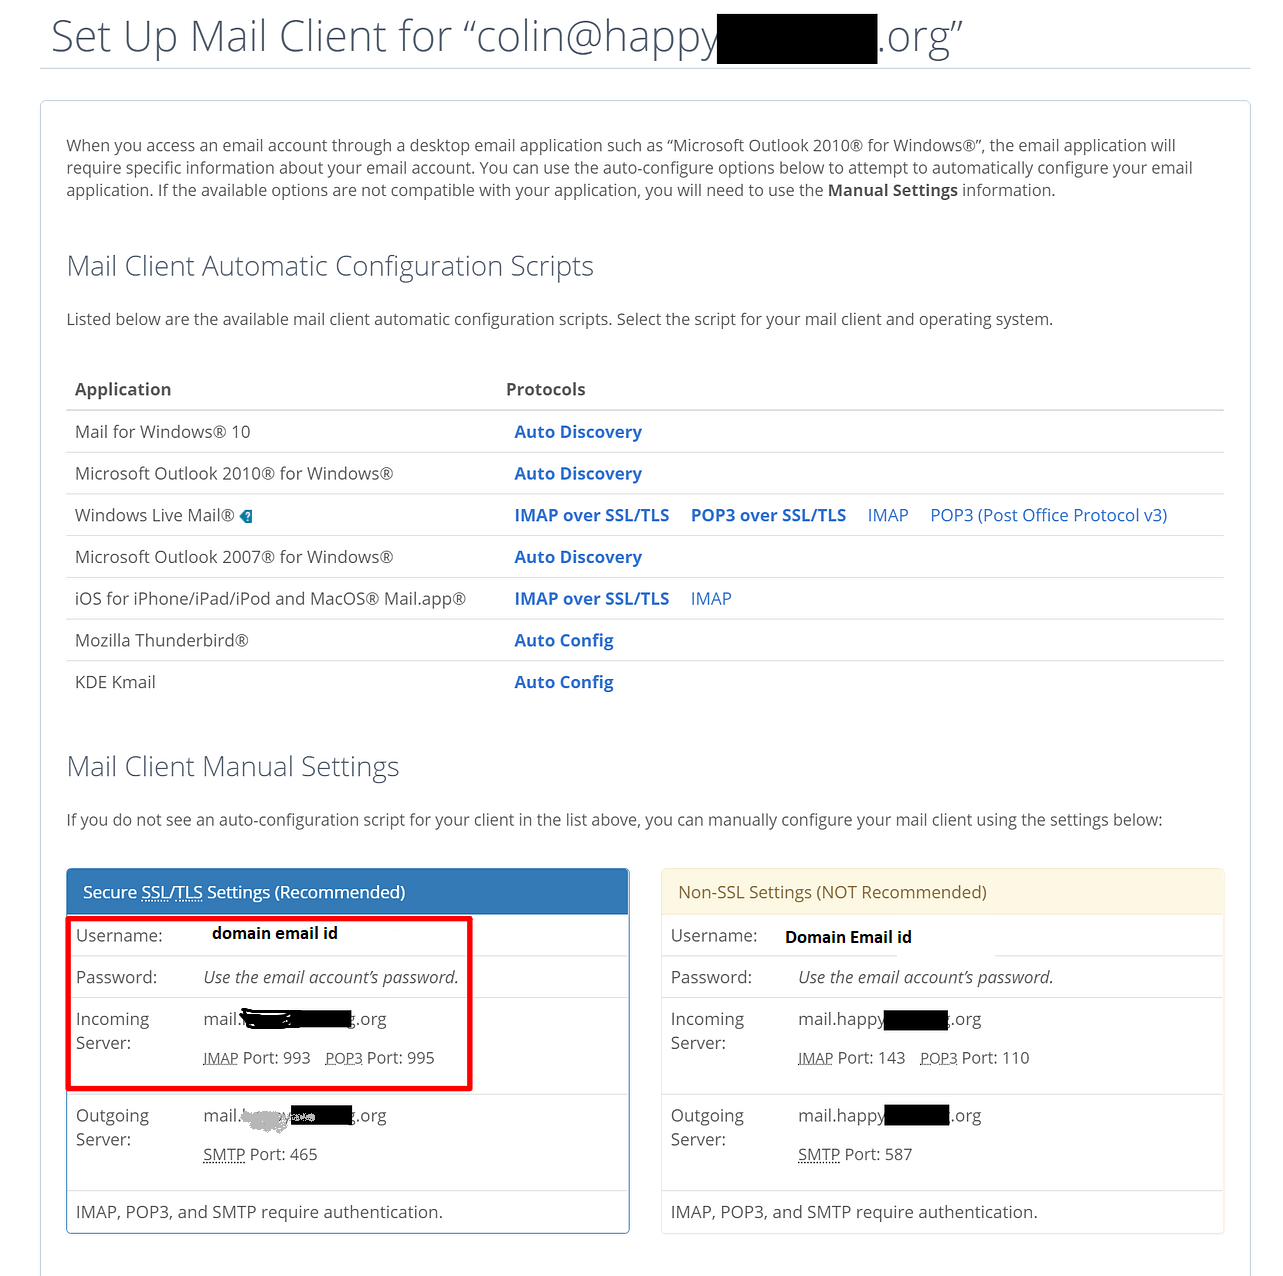
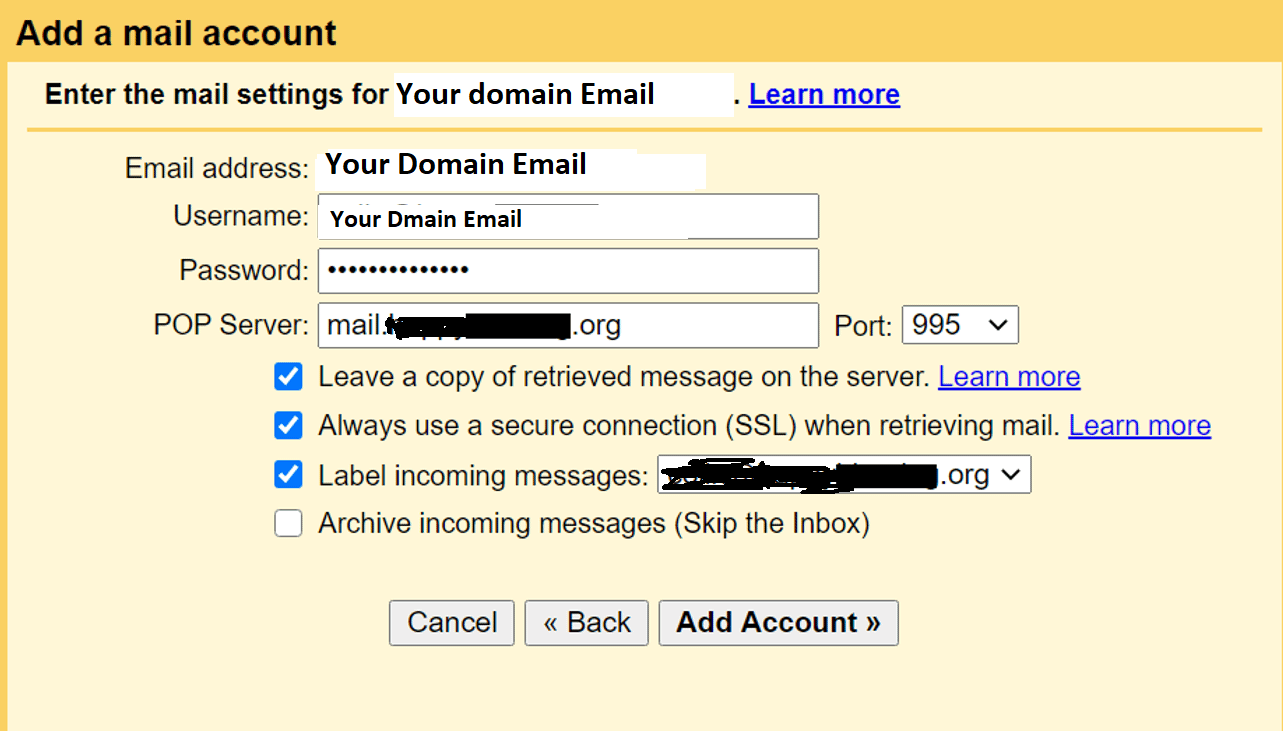
To begin, you need to discover your email's POP3 settings. you can do this by tapping the Connect Devices tab when you're altering your email account. This is what it would appear that check screen short below
Open Gmail and do the Following Steps
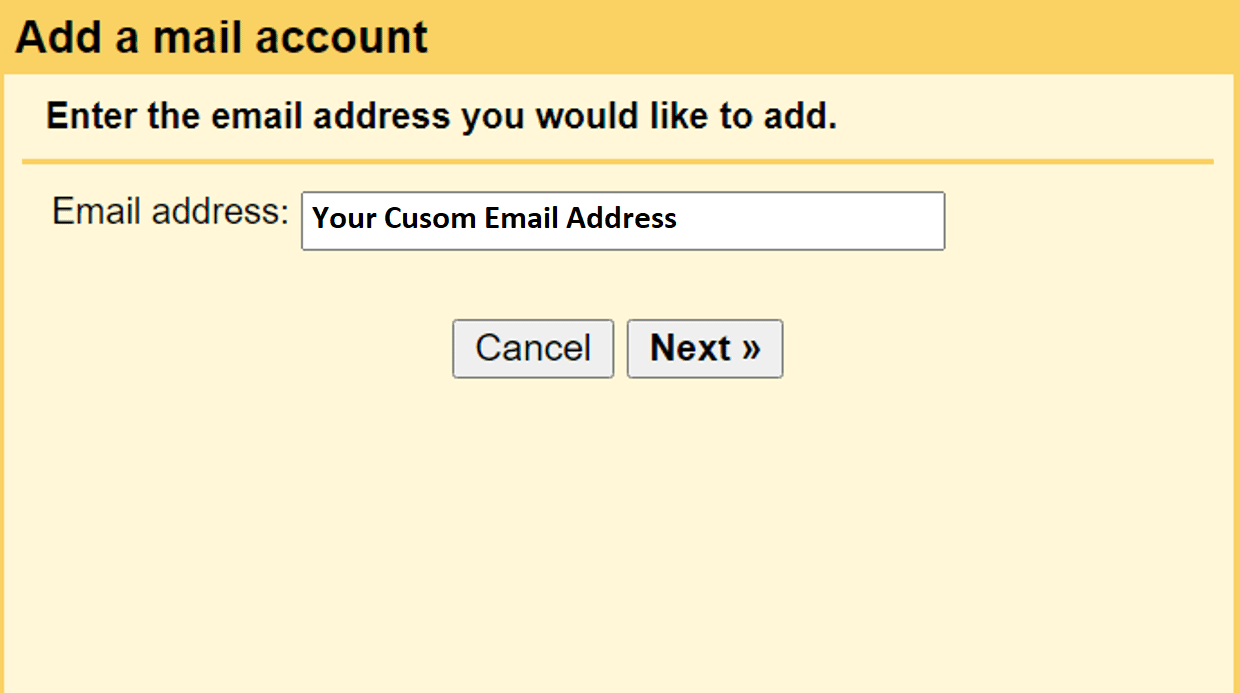
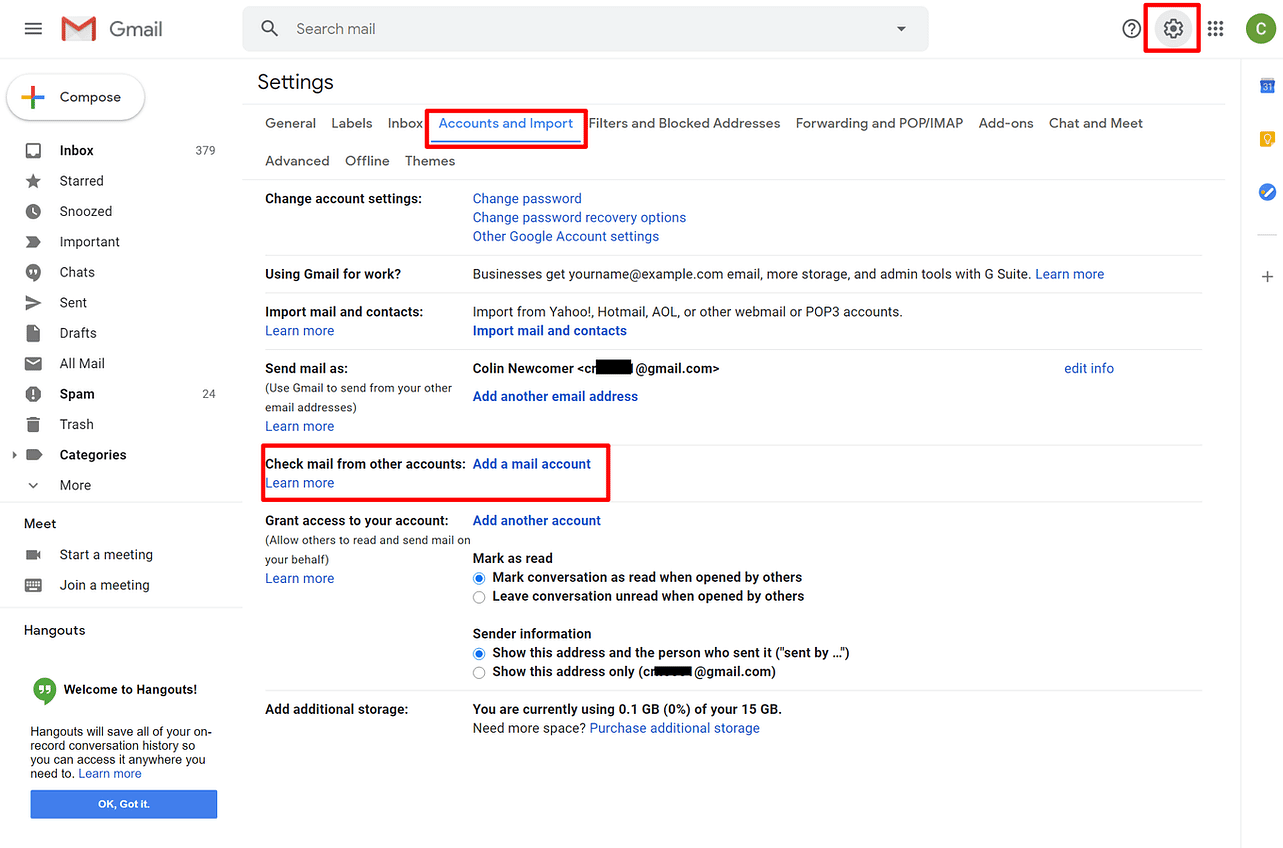 In the first step, enter your custom email address – e.g. you@domainname.com
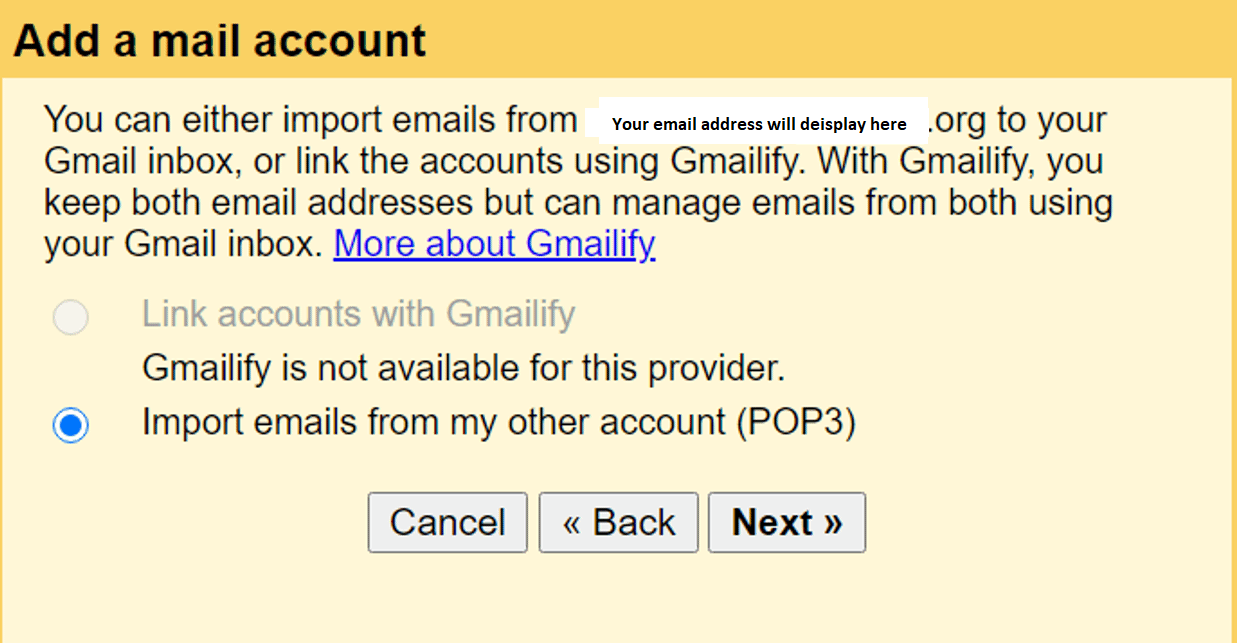
 The second step, choose Import emails from my other account (POP3):
Enter the following information:
At this point, new emails to your custom domain should show up in your Gmail account. However, you won’t be able to reply to them from your custom email domain yet.
Once you have your SMTP information:
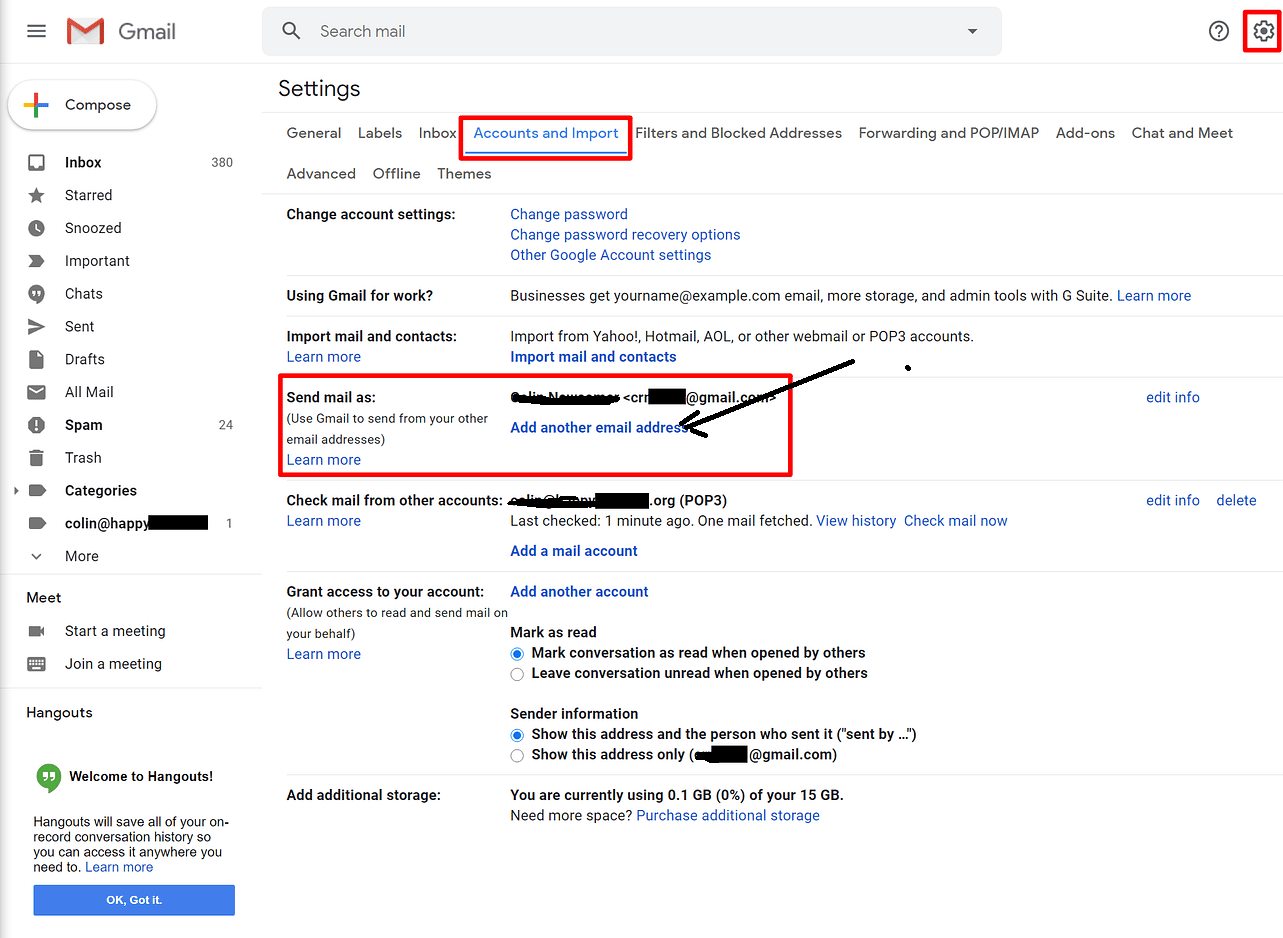
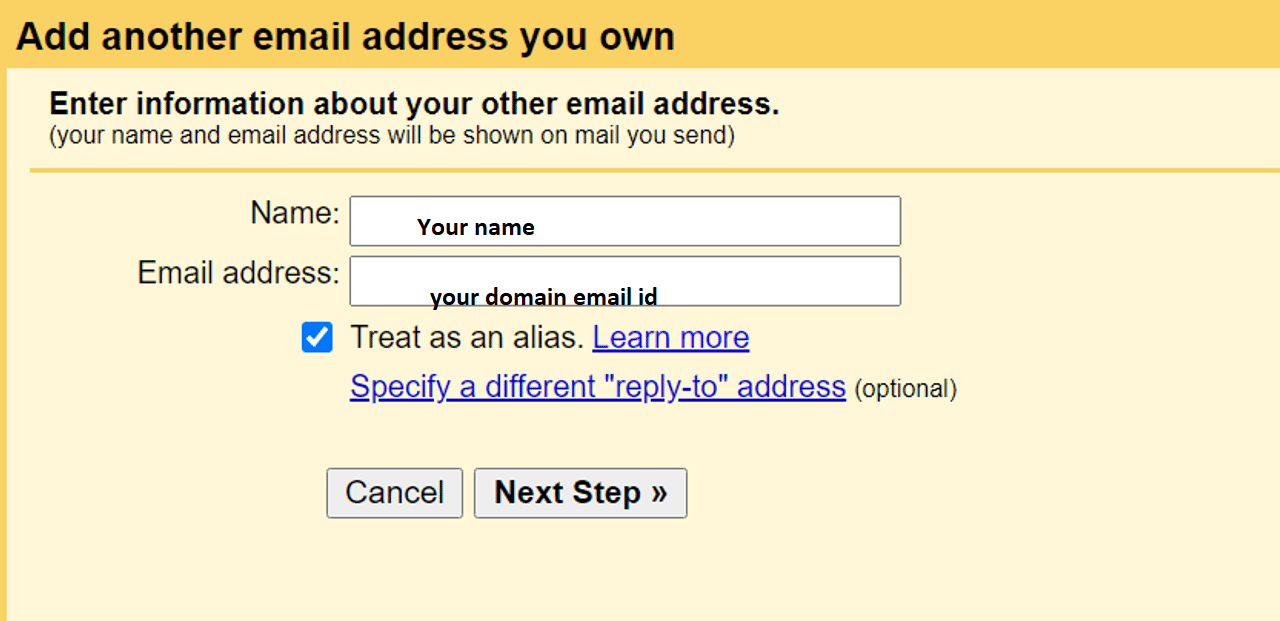
Enter OTP and Verify the Domain name with Google Now you can send and receive email through google with your own domain name
Request a FREE Business Plan.
 +91 ▼
+91 ▼ 
Best Web Design Company in Coimbatore A well-designed website is not only essential in today's digital-first world, but it is also a potent instrument for creating brand identification, i
Read More
In today’s dynamic digital landscape, having a user-friendly and highly customizable website is crucial for success. WordPress has emerged as a powerful Content Management System (CMS), enabling
Read More
Guide to Increase Laravel Performance and Optimize it Since its emergence in 2011, Laravel has become a very popular option for developing business-focused applications including information
Read More