How to Add images to WordPress Custom blog posts
In this blog post, we are going to explain how to upload images in WordPress media. The steps to inserting an image into a blog post in WordPress are:
- Place the cursor where you want the image to appear
- Click Add media.
- Click Upload then Upload Files and upload the image from your computer
- Enter a title text with keywords
- Choose the size, alignment, and link settings
- Insert the image.
1. Place the cursor where you want the image to appear
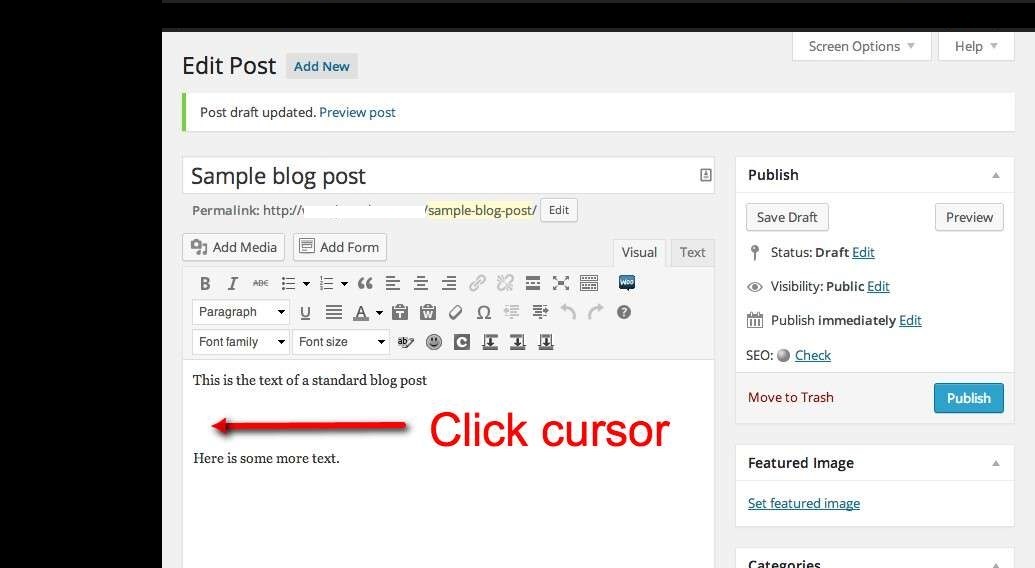
if you are inserting images in a blog post which will be aligned to the left or right place the cursor at the start of the line where you want to place the image.
2. Click Add media
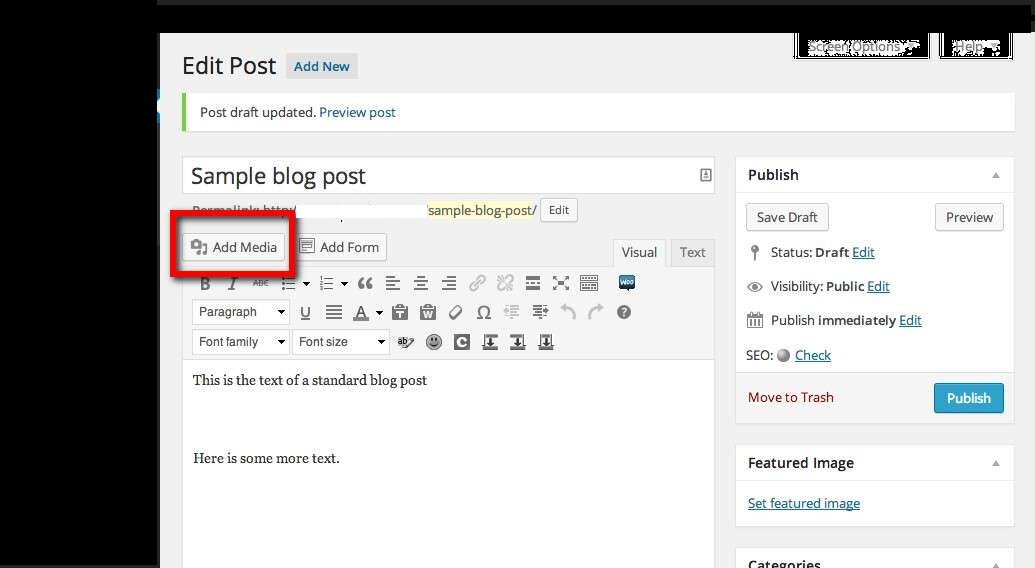
Click add to media button to add the image, PDF, and Document. Links will be placed in media for the Document and PDF.
3. Click Upload then Upload Files and upload the image from your computer
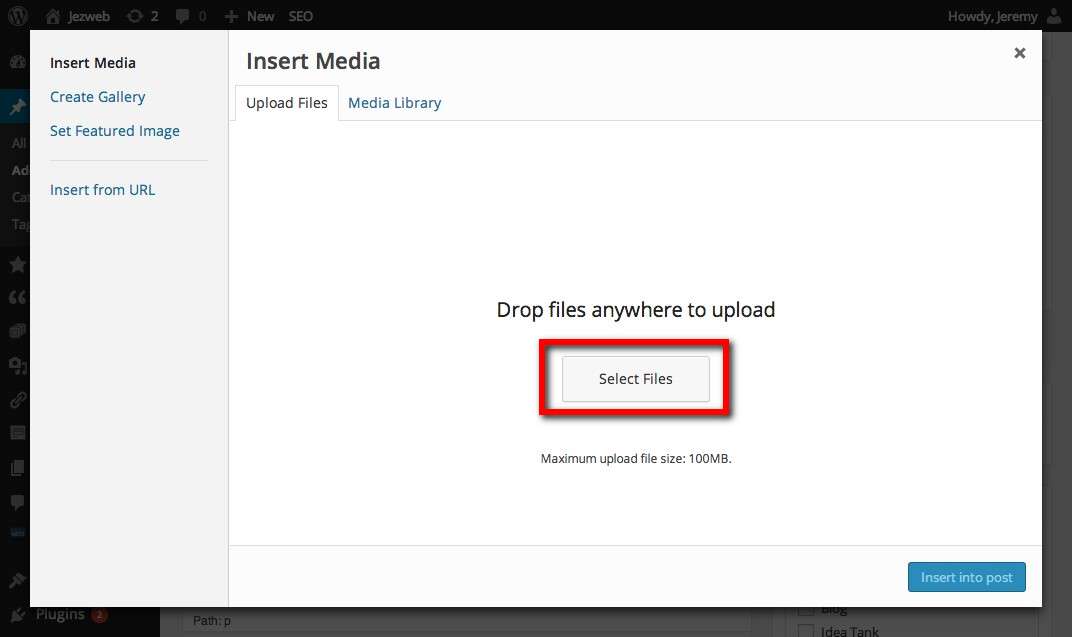
Once you have clicked Add Media you will be on the Media Library screen. If the image you want is already uploaded to your website then you can select it from the library and skip the upload process.
4. Enter a title text with keywords
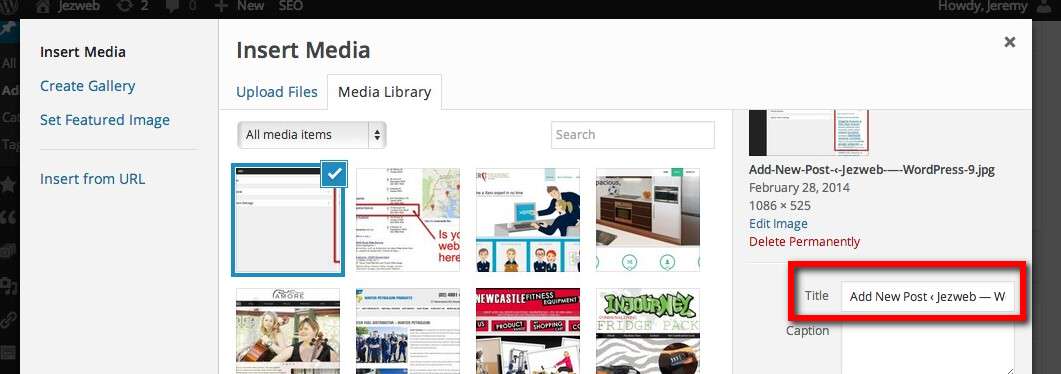
Add image title, short text description of the image which includes your keyword for that page or post.
5. Choose the size, alignment, and link settings
- Image sizes
- Alignment
- Link
Image sizes
By default, WordPress has 4 standard image sizes and you can define your custom size that suits your website
- Thumbnail (square): 150×150 pixels
- Medium: 300 pixels wide with the height scaled down accordingly
- Large: 1024 pixels wide, though we often set this to be the full width of your website content column, eg 700px
- Full: The maximum size of the image available
Alignment
There are four options available:
None, text, Left, Right, Center.
6. Insert the image
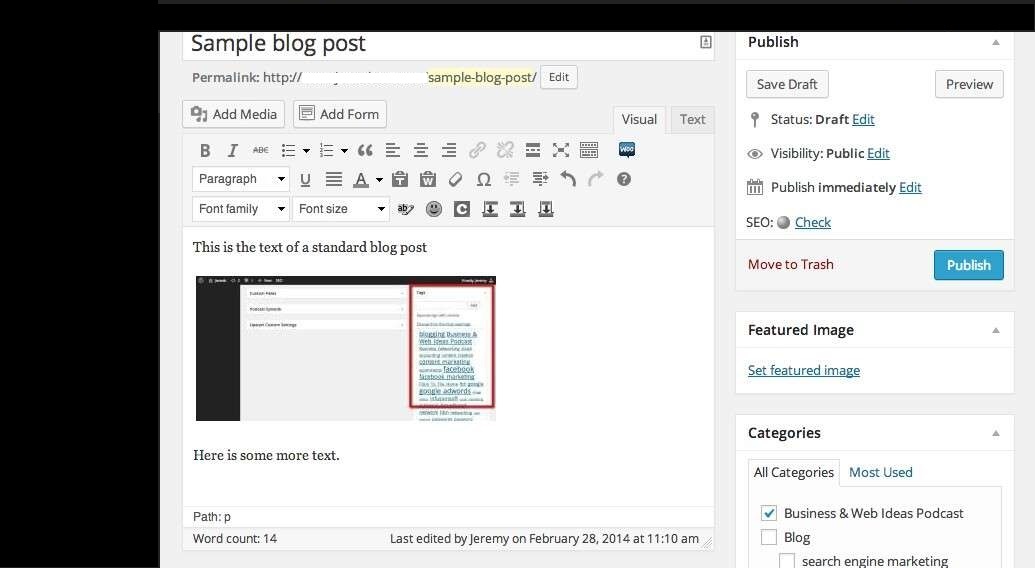
you have successfully inserted an image into your blog post.
If the image is already in the media library then you can skip the upload part. Blazingcoders are the best WordPress development company and you can also Hire a WordPress Developer on hourly bases


